
Below you will find a range of training, instructional and support information for using the RIW System. You can browse the various categories, or type keywords into the search box. If you are new to RIW, please view the Getting Started category.
Knowledge Centre Search
How does a company create a zone or edit zone requirements?
This article details how a contractor in charge (CIC) of a project can manage and maintain the zones associated with sites linked to their projects.
This instruction applies to the following RIW System User Roles:
- Advanced Project Admin
- Employer Admin
- Employer Admin - No Payment
- Project Admin
Step 1: Log in to the RIW System
Go to https://app.riw.net.au and login using your credentials.
Step 2: Administration tab
Click on the Administration tab.

Step 3: Zone shortcut
Click on the Zone shortcut.

Step 4: Zone listing
The list of zones will appear.
By default, only the active zones will appear. Tick the Show Inactive? box and click the Search button to include inactive zones in the listing.
Use the Name filter to select a specific zone or site and click the Search button.
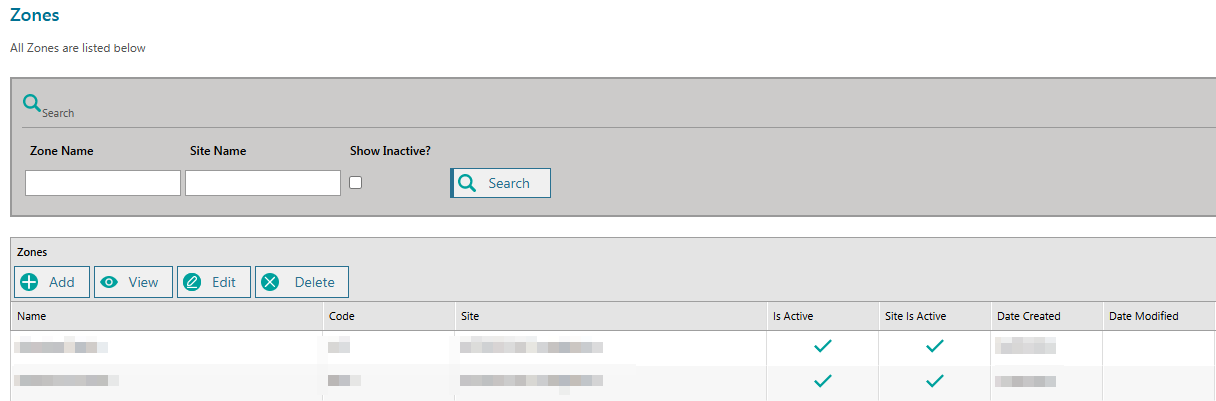
Step 5: Add a zone
To add a zone, click on the Add button.

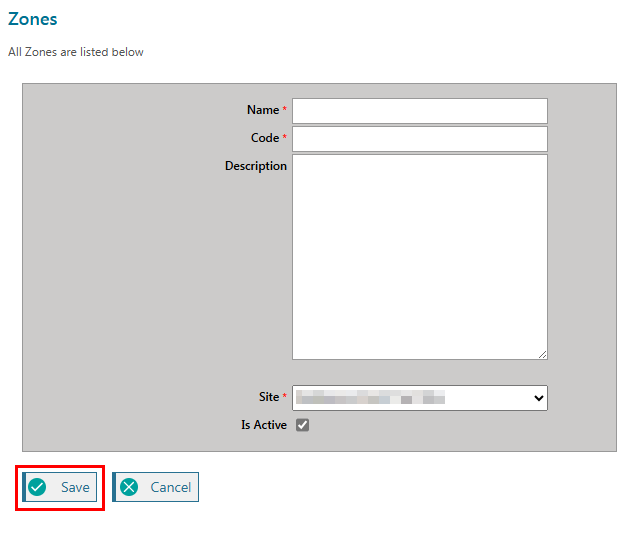
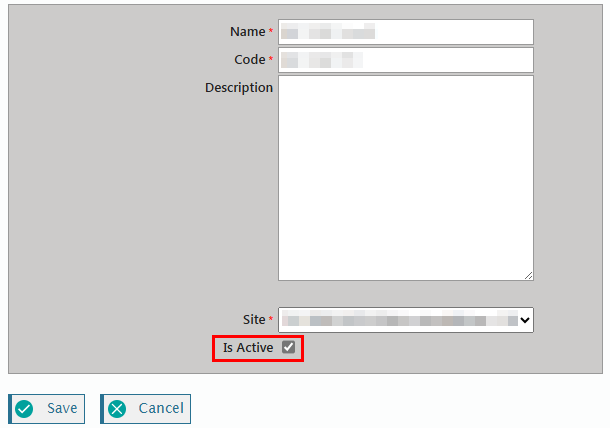
Step 6: Define the zone
Enter the zone name, code, and description. Use the drop-down list to associate the zone to the relevant site.
The Is Active box should be ticked if the zone is active.
Click save when complete.
Step 7: Edit a zone
To edit a zone, return to the Zone shortcut available on the Administration tab, and click Search to surface a list of available zones. Choose the zone to be edited and click on the Edit button.
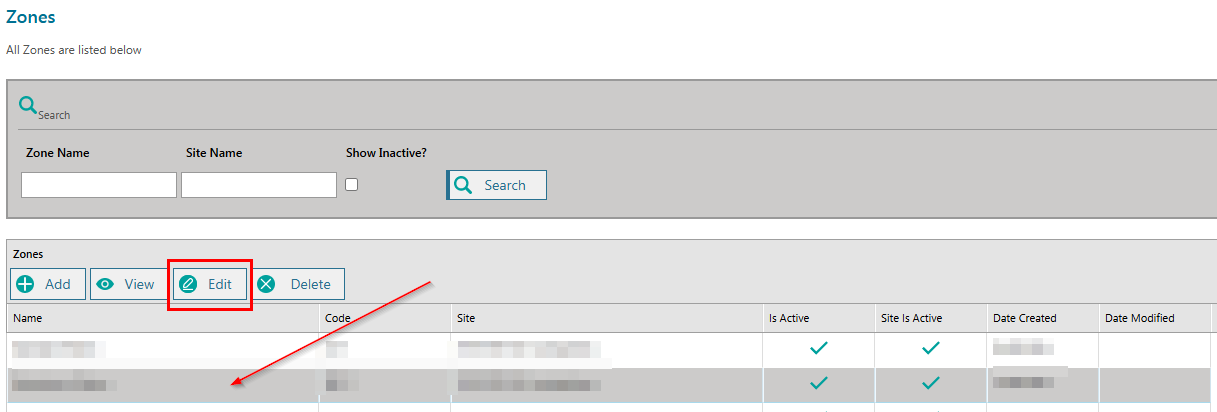
From here, you can update any of the zone requirements, including name, code, description or the assigned site relationship.
Step 8: Add Zone Requirements
Once the zone has been created, zone requirements may be added, which are prerequisite competencies cardholders must obtain prior to being granted entry to the zone.
Go to the Zone shortcut available on the Administration tab, and click Search to produce a list of available zones.
Select the zone to be edited and click on the Edit button.
Click on the Requirements tab on the left hand side menu. To add a requirement, click on the Add button.
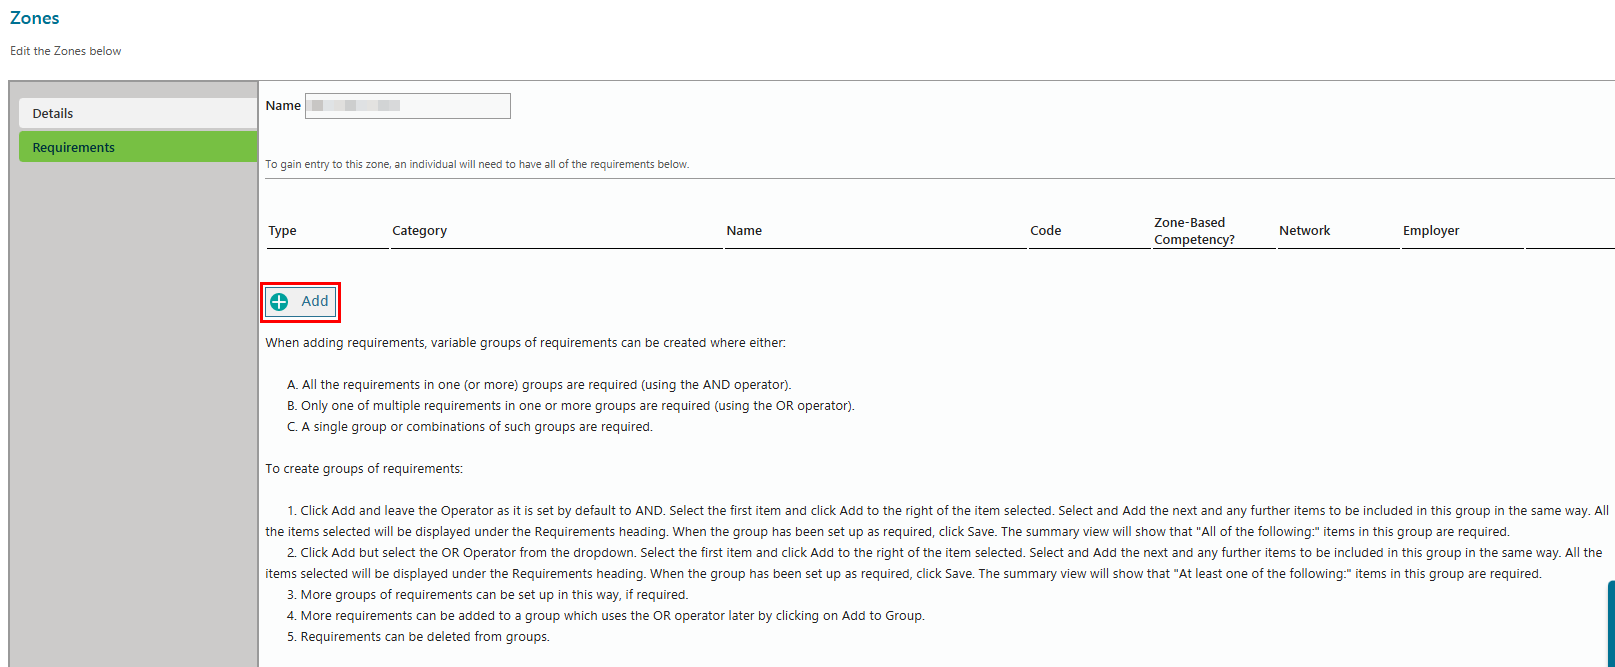
Step 9: Add Entry Rules
On the Add Entry Rules screen, specify the competency or job roles required for the zone. Please note when adding requirements that variable groups of requirements can be created where either:
- All of the requirements in one (or more) groups are required (using the AND operator)
- Only one of multiple requirements in one or more groups are required (using the OR operator)
- A singe group or combinations of such groups are required.
Please read the detail on the Add Entry Rules screen for further direction.
Search for each requirement in the relevant competency or job role field by starting to type in the field. In the example below, we have added the National competency Safely Access the Rail Corridor and the National - Around the Track Personnel job role.

When the required competency or job role has been surfaced, click Add to add it to the requirements. The requirements will now display at the bottom of the screen.
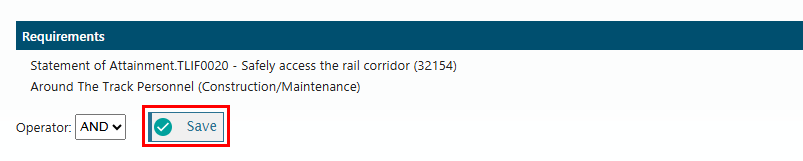
When complete, click Save.
Zone requirements have now been set.
Step 10: Deactivating a zone
To deactivate a zone, select the zone and click Edit. In the Details section, deselect the Is Active checkbox.
This zone will not be available to Access Controllers/Spot Checkers using the mobile RIW app, PC Card Reader or Web Card Reader.
VIDEO: Creating Projects, Sites and Zones
RIW Knowledge Centre Article Link:
https://support.riw.net.au/support/solutions/articles/51000151955
Did you find it helpful? Yes No
Send feedback