
Below you will find a range of training, instructional and support information for using the RIW System. You can browse the various categories, or type keywords into the search box. If you are new to RIW, please view the Getting Started category.
Knowledge Centre Search
-
- About the RIW System
- Administration
- Blocks & Suspensions
- Business Rules & Matrices
- Cardholder Management
- Competency Management
- eLearning
- ID Checks
- Job Role Management
- Logins & Passwords
- Medicals and Drug & Alcohol
- Network Management
- Messaging
- Payments
- Premium Functionality
- Projects, Sites & Zones
- Reporting
- Reporting - Power BI
- RIW Cards
- Swipes & Shifts
- System Notifications
- Visitor Management
- Work Restrictions & Risk Assessments
How does a company add, edit or remove a work restriction for a cardholder?
Work Restrictions can be added to a cardholders profile manually by the Primary Employer of the cardholder, or automatically when a medical assessment results in a work restriction being applied to the cardholder by an Authorised Health Professional.
This article details how to manually add or edit a work restriction for a cardholder, which includes removing (or de-activating) the work restriction when the restriction no longer applies.
This instruction applies to the following RIW System User Roles:
- Employer Admin
- Employer Admin - No Payment
- Helpdesk
Step 1: Log in to the RIW System
Go to https://app.riw.net.au and login using your credentials.
Step 2: Search for cardholder
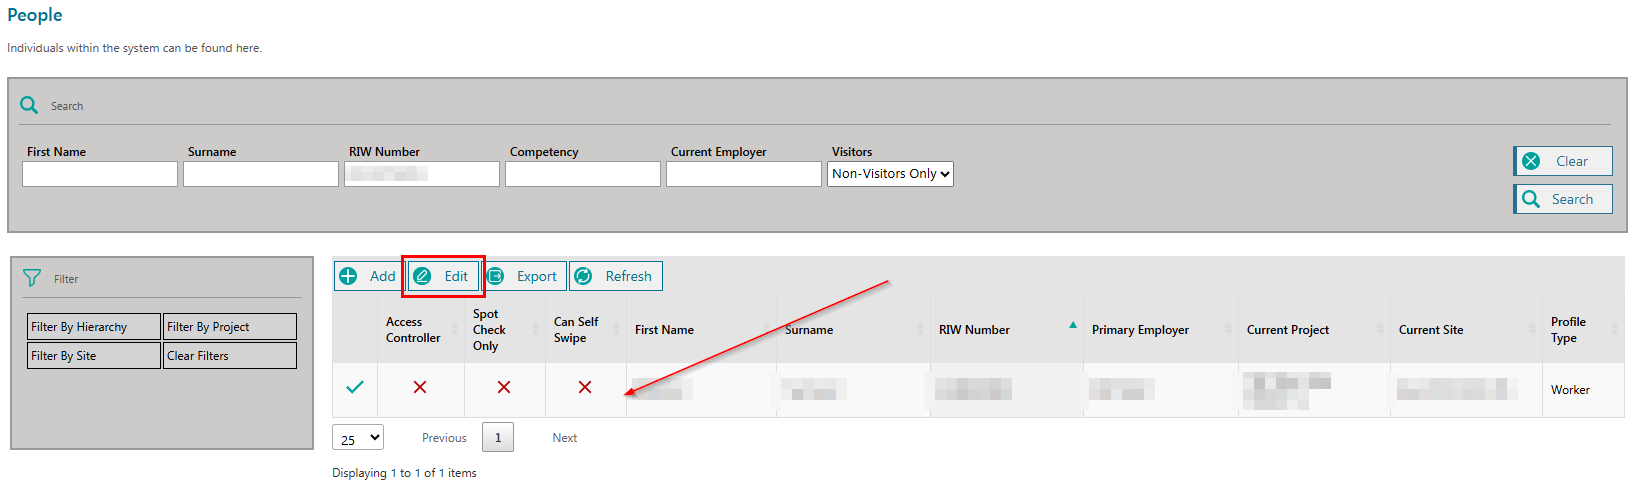
On the Main Dashboard, click on the Search for My People shortcut.

Step 3: Search Criteria
Complete search criteria to find the cardholder and click on the Search button.

Step 4: Highlight cardholder
From the returned results, highlight the cardholder row and click on the Edit button.

Step 5: Adding a Work Restriction
Select the Work Restrictions tab from the left-hand side menu, and then click the Add button and fill in the dialogue box.

- The Work Restriction field has a drop-down selection of available restrictions.
- The From Date is the date that the restriction is applied to the cardholder's profile.
- The Review Date is the date the restriction is to be reviewed for potential removal.
- The Is Active box needs to be ticked for the restriction to be applied.
- When the Create Risk Assessment box is ticked a further dialogue box will appear for completion.
If a risk assessment is not required to be attached to the work restriction, clicking Save will save the work restriction.
Step 6: Create Risk Assessment (optional)
If the Create Risk Assessment box is ticked, an additional screen will appear to capture details of the risk assessment, including any attachments which are required to be uploaded. Click Save when all information has been entered.

Step 7: End or edit a work restriction
To edit a work restriction, locate the cardholders record as detailed above and click on the Edit button. From here the notes or the dates can be updated. However, best practice would be to end the work restriction as it stands, and to create a new work restriction if required.
To end the work restriction, remove the Is Active tick and click Save.

Step 8: View all work restrictions
To view all work restrictions applied to the cardholder, go to the Work Restrictions tab on the left-hand side menu, and click on the Show All button before clicking Search. This will display all active and inactive work restrictions applied to the cardholder.

RIW Knowledge Centre Article Link:
https://support.riw.net.au/support/solutions/articles/51000149995
Did you find it helpful? Yes No
Send feedbackHow does a company add, edit or delete a risk assessment for a cardholder?
The article details how to manually enter a risk assessment as a stand-alone record. Please note that a risk assessment may also be added as part of adding a work restriction to a cardholder.
This instruction applies to the following RIW System user roles:
- Advanced Project Admin
- Employer Admin
- Employer Admin - No Payment
- Helpdesk
Step 1: Log in to the RIW System
Go to https://app.riw.net.au and login using your credentials.
Step 2: Search for My People
On the Main Dashboard, click on the Search for My People shortcut.

Step 3: Search Criteria
Complete search criteria to find the cardholder and click on the Search button.

Step 4: Select cardholder
From the returned results, highlight the cardholder row and click on the Edit button.
Step 5: Risk Assessments
Select the Risk Assessments tab from the left hand side of the page.
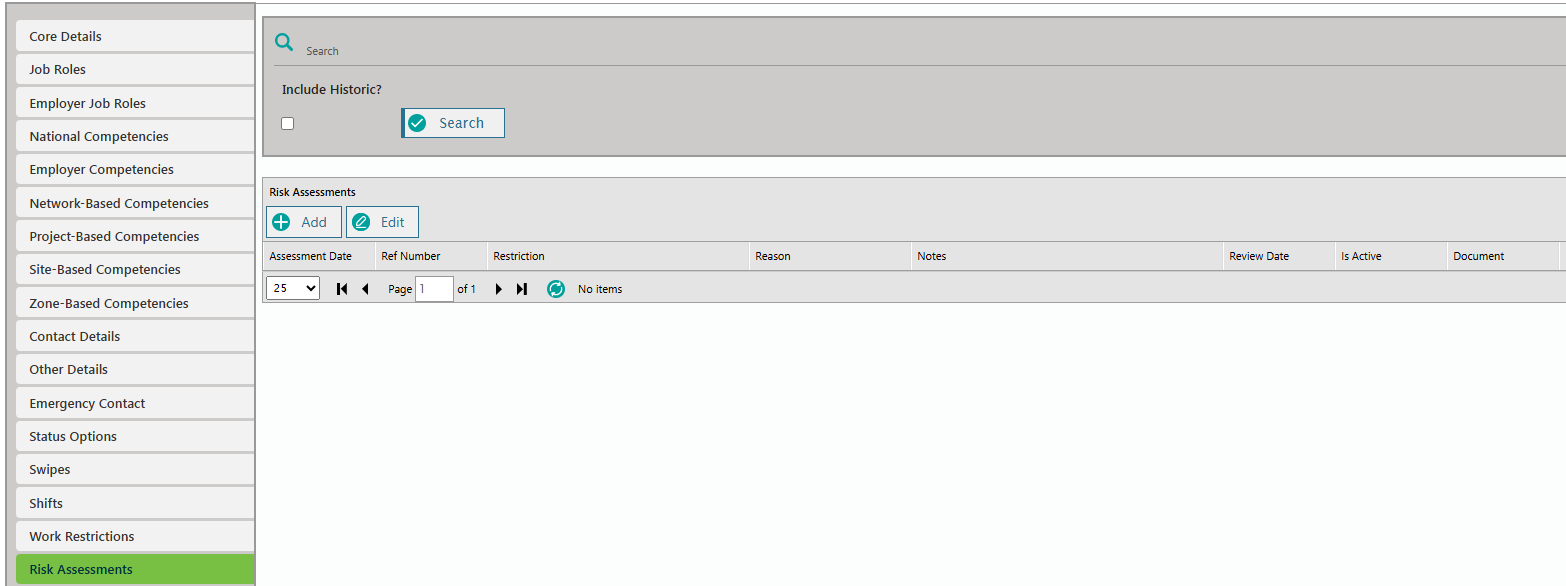
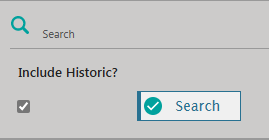
The default view is only active risk assessments. To view historic risk assessments, click on the Include Historic? tick box and then click Search.
Step 6: Add a Risk Assessment
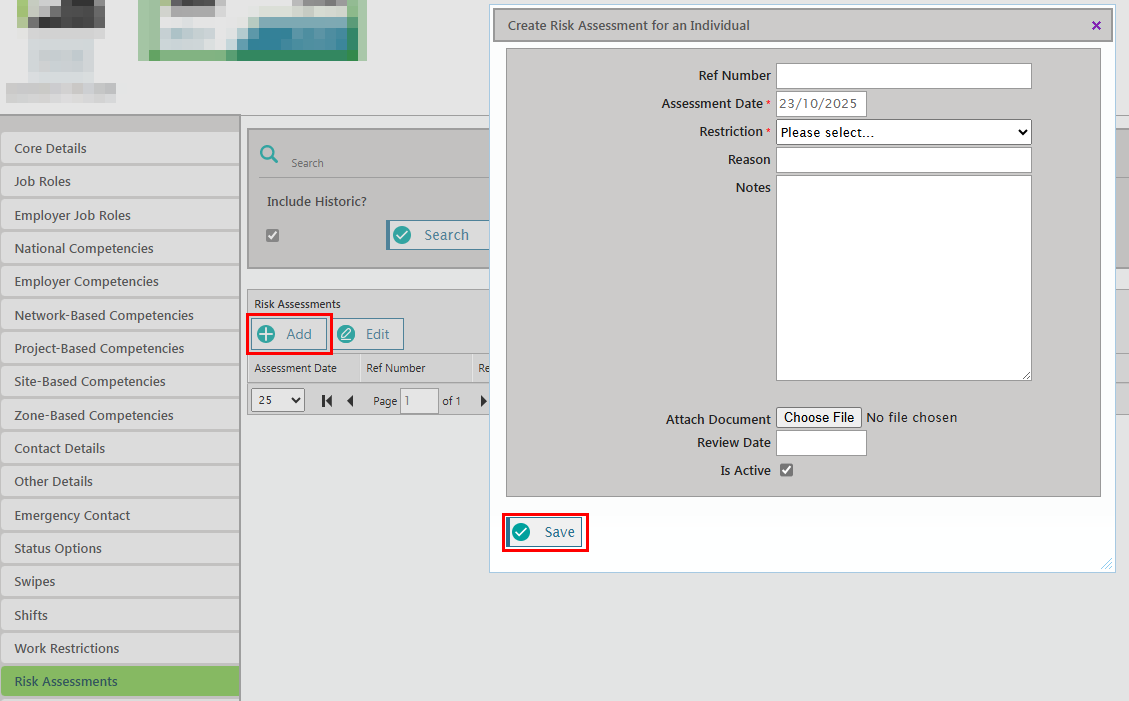
To add a risk assessment, click on the Add button.
Fill in the required details in the Create Risk Assessment for an Individual dialogue box, including reference number (if applicable), assessment date, restriction, reason, and notes.
The risk assessment document may also be uploaded.
Include a review date, and if the risk assessment is active, ensure the Is Active checkbox is ticked.
Step 6: Editing or Deleting a Risk Assessment
If you wish to edit a risk assessment, select it by highlighting the row and clicking the Edit button. The Edit Risk Assessment for an Individual dialogue box will appear.
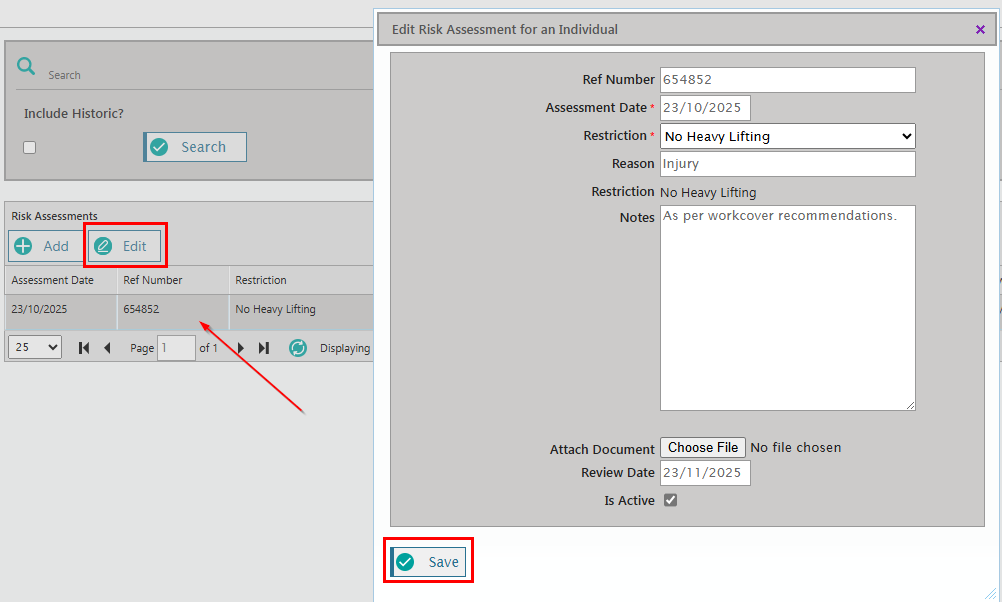
All fields can be edited as needed, such as changing the review date, updating the notes.
To delete a risk assessment, deselect the Is Active tick box.
RIW Knowledge Centre Article Link:
https://support.riw.net.au/support/solutions/articles/51000150092
Did you find it helpful? Yes No
Send feedback